Thursday, December 22, 2011

Christmas Tags Wall Hanging

I'm back, no new computer yet but have managed to borrow my hubby's for a bit.  Today I have some tags to show you.  We made these at my last class and had an absolute ball puting them togther.  I even made two sets, one for me and one for my mother-in-law.  Needless to say, she was wrapped as was everyone at the class.
 There are four tags in the set.  They were cut out using the Two Tags Die from Stampin' Up!  They all have different elements made with mostly Stampin Up stuff to finish them off.  Can you spot the non-Stampin Up paper?  I was inspired by a set of tags I saw by a lady in America, Sandi McIver, and decided to give it a go with what products we have available in Australia.

After the class, we all decided these tags were too good to give away and we turned them into a wall hanging or tree decorations to keep for ourselves.  How selfish are we.......

Here is each tag up close for you to see the finer details.  Each Tag has a different Ribbon using either Seam Binding or lace and a different Antique Brad.  I just love these vintage projects.


The flower on this tag was inspired by a New Zealand Demonstrator, Sharlene Meyer and you can check out her version here.
 This is my favourite.

I hope you enjoyed these.  I have a few more things to show you soon.

MERRY CHRISTMAS
3 SLEEPS TO GO


Thursday, December 15, 2011

OUT OF ACTION

Hello everyone, I am so sorry I have not been back here for a little while.  My Laptop has died (no help from that cold cup of tea I had sitting nearby when the boys started chasings through the house).  I believe the data is still ok (thank heavens) but I have no way of updating my blog till I get a new one.  So please be patient.  I have some wonderful things to show you when I return which hopefully will be very soon.

There are so many nice products coming in our Sale a bration catalogue coming out in late January.  It really is a good time to think about having a workshop or gathering some orders together to take advantage of the extra special items you can earn for free.  If you would like to get in early you can email me and I will set up a date for you.

A very Merry Christmas to you all and thank you for stopping by here to check things out.  I hope you have received a little inspiration and ideas to help your own crafting projects along.  

regards

Tina
xx

Monday, November 28, 2011

12 Weeks of Christmas #9 - Welcome Christmas Swing Card


Ok, I know I have missed a week.  These weeks are coming and going so fast and I am struggling to keep up with all there is to do.  Two weeks of School left, Teacher's Presents to organise not to mention the family and getting things ready for Christmas for us.

Today I have a card that I made as a special treat for my mum.  Its called a swing card and when it closes the middle piece swings back on itself and folds up into the size of a normal card.  You can find a wonderful tutorial at Splitcoaststampers by clicking here

I've used the music wheel to add a bit of interest to the background and added a couple of embossed corners to create texture.  In the middle piece I have gone quite elaborate and cut out both the Wreath and the word Joy and mounted them up on Dimensionals.  I have put two thicknesses behind the "O" to keep it at the same height as the "J" and "Y".  I also clear embossed the word Joy and added Crystal Effects to the small berries on the wreath.


The glittery gold looking cardstock was made using Soft Suede this time and my Trusty Champagne Shimmer Paint spread over the edges using a dauber to create a gold glimmer paper.  This card looks so good in real life.  Definately not one you throw together in 15 minutes but the effort you put in sure is worth it when it's finished.

Thanks for stopping by and having a look.


Monday, November 14, 2011

12 Weeks of Christmas #8 - Dasher


Hello everyone.  This week I have a Christmas Card for you made with the gorgeous "Dasher" stamp.  You can't believe how excited I was when I discovered that this stamp was in the Idea Book and Catalogue from Stampin Up.  It is probably my most favourite Christmas Stamp ever.

This card is one from a recent Stamp-a-Stack I held.  The colours are Very Vanilla, River Rock, Cherry Cobbler and Dasher is Chocolate Chip.  I have also used one quarter of the "Medallion" stamp.  It is also a favourite of mine, fantastic background stamp.

If you take a closer look of the card you might see that I have sprinkled just a little of the Champagne Fine Glitter amongst Dasher's gorgeous antlers.  Just adds a little bit of bling without overdoing it.  The sentiment is from the Four Seasons Stamp Set and I added a little bit of Cherry Cobbler Seam Binding to finish it off.

Thanks for looking :)

Sunday, November 6, 2011

WOW Presentation at Brisbane Regionals for Stampin Up

 Yesterday I was asked by Stampin Up to present a WOW demonstration at Brisbane Regionals.   I don't know if this technique has a name but I decided to show the technique of inking up the inside of your embossing folder which accentuates the embossed pattern after it is run through the Big Shot Machine.

For those wanting to give it a go here are the steps I follow to achieve the best results:-

You will need:
  • cardstock of your choice which is smaller than the embossing folder itself.
  • Ink Pad
  • Embossing folder
  • Brayer
  • Dotto (repositionable glue tape)
  • Big Shot and plates
  1. First thing to do is ink up your brayer with the ink pad making sure it is well covered.
  2. Run the inked Brayer back and forwards over the inside of the embossing folder (the recessed side only) till the ink is well and evenly distributed.
  3. Run a bit of Dotto on the back of your piece of cardstock so that when you place it on the other side of the folder it will stick down in place and not move making it easier to assemble the big shot sandwich without the cardstock shifting and rubbing ink where you don't want it.
  4. Close the folder up and place it on the multipurpose platform with only tab 1 open between the cutting plates an run it through the big shot slowly.  It might be a tight squeeze but it ensures that the ink touches all parts of the background embossed image.
  5. Open the folder and Vwala (is that a word).
To clean my folder and Brayer I just run them under a cold tap till they are clean and pat dry with a piece of paper towel.

 I demonstrated the JOY card from my previous Post but also showed some other examples using different coloured inks and other embossing folders and the effects you can get.

Here I used the striped embossing folder and I ran it through twice, reinking the folder to make the impression darker and then running it through again after turning the cardstock 90 degrees to achieve the checkered pattern.  This would make a great man's card.  I used Cajun Craze ink on  More Mustard cardstock and Early Espresso for the greeting.


The next card I used the Finiel flowers folder with Crumb Cake Ink on Naturals Ivory Cardstock.  I was really happy with this card.   This is the new Kindness Matters stamp set which I just love and it's only $19.95. 

This was a favourite of mine also, the Petals a Plenty Folder using Pool Party Ink on Whisper White Cardstock.   This looks so pretty in real life.  I added a bit of ruffled ribbon and added the flower which is the spiky flower cut twice from the Blossom Party Big Shot Die. I spritzed it with Frost White shimmer paint in a spray bottle mixed with rubbing Alcohol giving it a couple of goes for maximum effect.  A relatively easy card for a workshop I think.


Hope you can follow my instructions but if you have any questions, feel free to email me and I'd be happy to help you out.


12 Weeks of Christmas #7- Welcome Christmas


Hi Everyone, today I have another Christmas card for you using the Welcome Christmas Stamp Set from Stampin Up together with the Vintage Wallpaper Embossing folder and the new Champagne Glass Glitter.  I have embossed the word Joy using the new Cherry Cobbler Embossing Powder and I have used Soft Suede Ink to highlight the pattern in the embossing folder.

I demonstrated this card yesterday for my WOW presentation at the Brisbane Regional Seminar for Stampin Up.  I was asked to present a WOW technique in 5 Minutes.  I decided to show how to ink up the inside of your embossing folders which helps accentuate the pattern of the folder once you run it through the Big Shot.  We all know the technique of rubbing a sponge dauber or piece of sponge over the raised impression but I thought I would highlight the background "Recessed" part by inking it in a different or similar colour to the cardstock.  In my next post I will describe how I achieve this technique and show you the other cards I had to display at Regionals.  Stay tuned.........

Monday, October 31, 2011

12 Weeks of Christmas #6 - Single Stitched Stocking

Today I have a card that was one we made for my recent Christmas Stamp a Stack.  We used the Stitched Stocking Stamp Set along with the matching Punch to create a single Christmas Stocking.

This was quite a simle card.  I haven't put the different cuff or toe and heal piece onto the stocking, just kept it easy.  The words are from the Teeny Tiny Sentiments and I punched them out with the bottom half of the Decorative Label Punch.

The colours used are Real Red, Whisper White and Lucky Limeade.  And of course a tiny rhinestone placed in the middle to finish off the card.

We have Regionals this weekend and I have a card or two to show you that I will be presenting as my Wow presentation.  Wish me luck and happy creating.


Sunday, October 30, 2011

Blog Lovin

Follow my blog with Bloglovin

This is a fantastic sight that allows you to add the blog addresses of your favourite blogs you love to follow.  It will advise you when there is a new post by that blogger.  No need to keep checking which gives you more time to be creative and less time on the computer LOL.

Check it out and don't forget to add my address to your favourites :)

Tina

Monday, October 24, 2011

12 Weeks of Christmas #5 - Delightful Decorations

Welcome to my 5th week of Christmas creations.  This week I have made a card using the Delightful Decorations set which also has a matching punch to cut out the baubles.  The colours used are Very Vanilla, Marina Mist and my favourite, Cherry Cobbler.  A rhinestone in the middle of the bauble finishes it off as well as the Very Vanilla Satin Ribbon across the top. 

I also like to use the Petals a Plenty for Christmas and I used it again here.  I kept the bottom quarter out of the folder leaving a blank space to stamp my words "Merry Christmas".

See you next week if not before.

Monday, October 17, 2011

12 Weeks of Christmas #4 - Snow Swirled


I confess that I made this card last year and forgot to post it on my blog.  I have to say I was pretty chuffed after I finished this one.  It was a layout challenge at a retreat I went to and I don't normally do Layout Challenges but I should LOL.  I think this came up a treat.  I have used the lovely set "Snow Swirled".  It is so elegant with the fancy tree and snow flakes.   I have put the red piece of cardstock through the Petals a Plenty embossing folder and then used Shimmer Mist to give it a dazzle. 

I used the music notes wheel on the bottom of the card with Crumb Cake to add a bit of a Christmas Carol feel and tied a big red satin bow.

I stamped the tree image and the words first before cutting the right side of the circles off. That way you can get your words straight.  Added a few rhinestones to the tree and your done.

Monday, October 10, 2011

12 Weeks of Christmas #3 - Tags til Christmas

 Happy Monday to everyone.  Today I have another card I have made using the Tags til Christmas stamp set.  I know it's the same stamp as I used last time but I just love it.
 I have also got stuck into the new Glass Glitter from Stampin' Up!  It's my new best friend.  I love it.  So much less messy than the fine glitter and gives a totally different effect too.  I've used Champagne Glass Glitter on this card.  I believe it is supposed to "age" over time and become a bit tarnished.  That would just add to the effect I reckon.

To apply it to my card I used the Multipurpose Liquid Glue so it had a bit of staying power.  It finishes the card of beautifully I think.

I have also used my embossing folders, Vintage Wallpaper and Petals a Plenty and I can't get away from the good old Cherry Cobbler colour either.  Sorry - I hope to have a different coloured project for you next week.LOL

Till next time, happy stamping.

Monday, October 3, 2011

12 Weeks of Christmas #2 - Stitched Stockings


 Monday again and today I have another Christmas Card for you from my 12 weeks of Christmas.  Isn't this gorgeous.  It is a brand new set Stampin' Up! has released for Christmas.  You can get it from the upcoming Summer Mini Catalogue in December but for this month you can order the stamp set and the matching punch early.  BUT WAIT! there's more.  If you have a workshop during October with your sales reaching $450+ (or put in an order for yourself or gather some orders from friends totalling $450+) you can get the stamp set and the punch valued at nearly $80 for FREE on top of the other great hostess gifts you get for hosting a workshop.    Contact me if you would like to book a workshop, place an order or click here for more details. 

Tuesday, September 27, 2011

Explosion Bag Template

Quick Hello to let you know I have had a number of emails asking for the Explosion Bag Template (Hi Paula).  I have finally worked out how to attach a copy to my blog.   You can find it here at the end of the post.   Hope this helps.  If you have any problems, please contact me.

Monday, September 26, 2011

My 12 Weeks of Christmas

Hi everyone and welcome to my Twelve Weeks of Christmas.  I will be posting every week from now till Christmas a Christmas project for you to check out.  Can you believe its only 12 weeks till Christmas.  Where has the year gone.    There are so many nice things for us in the new catalogue and there are some surprises for us all in the new Mini which comes out in November.   The first card I have for you is quite vintage I think.

I have used the music wheel for the background and just given it a little twist as I ran it across the page diagonally to make it curvy.  The Cherry Cobbler piece of Textured Cardstock has been embossed with the Petals a Plenty Embossing Folder and the stamped image comes from a new Christmas Set called "Tags til Christmas".

Can you see the gold frame.  To achieve this you just need a touch of Champagne Shimmer Paint on the end of a dauber and dab it over the Crumb Cake Frame (another new embossing folder too) to get the gold look.   The ribbon is Crumb Cake Seam Binding made into a double bow finished of with those gorgeous antique Brads.

I'll be back next week with a new Christmas Project for you.  If there is anything you need to help you achieve these projects, just drop me a comment and I'll help you out.


Thursday, September 22, 2011

My Catalogue Launch

This could be my biggest post yet.  Morning everyone! Today I have some photos from my catalogue launch I had on Saturday to share with you.  We all had a wonderful time (bit hot for Spring LOL) and everyone got lots done of both my samples to complete and their own work.  Most worked on Christmas stuff which of course is the next big thing that is creeping up quickly on us.

Here is a look at my display board and a few other things.


This is my bird cage I recently bought while on holidays.  I thought I might jazz it up a bit with some Butterflies and glitter.  My family loves it so I guess I'll keep it for a while on my sideboard.


All the ladies looking busy.  Lots of room to spread out and make a mess.

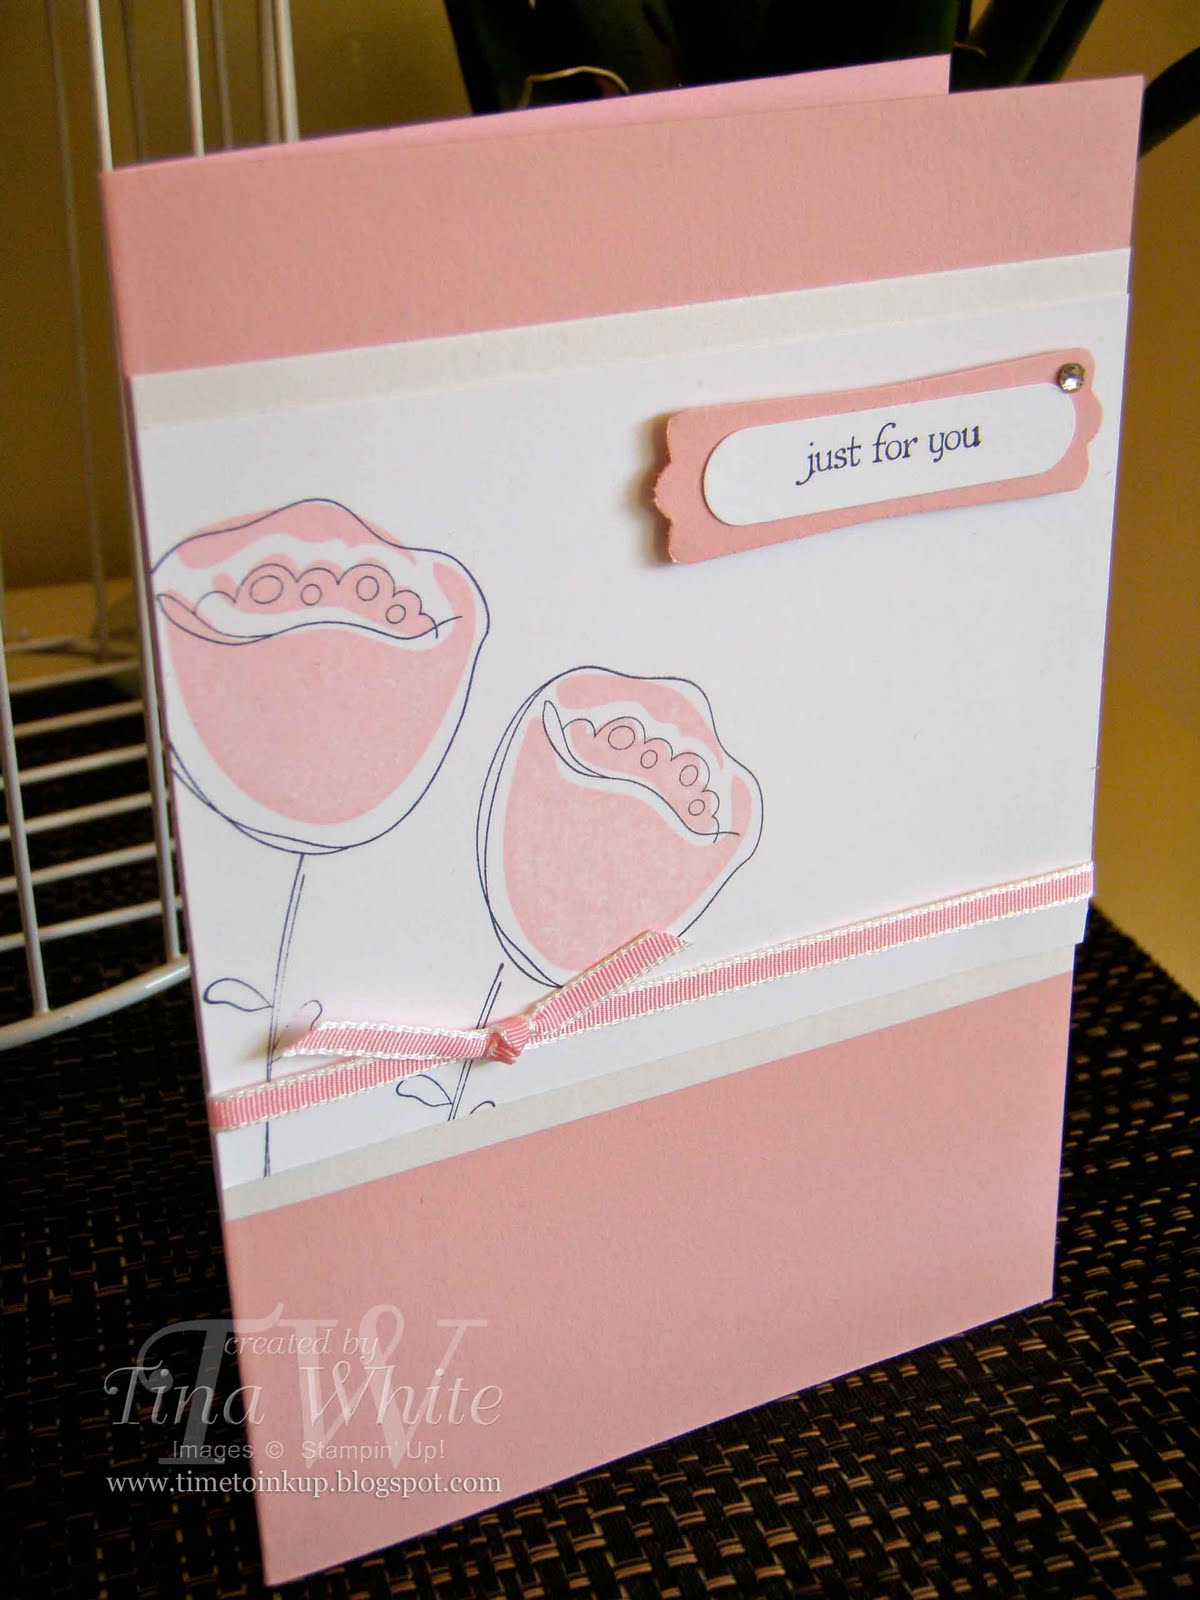
During the day I had some things for them to create.  Here are the samples they could reproduce and take home.  They made two of each of these cards.

 This card may look familiar to some.  It was very similar to the card we made at Convention with a few changes of my own made to it.  I love the Creative Elements Set and use it often.  The colours I used were Crumb Cake, Cherry Cobbler and Not Quite Navy.  Just love the Seam Binding.

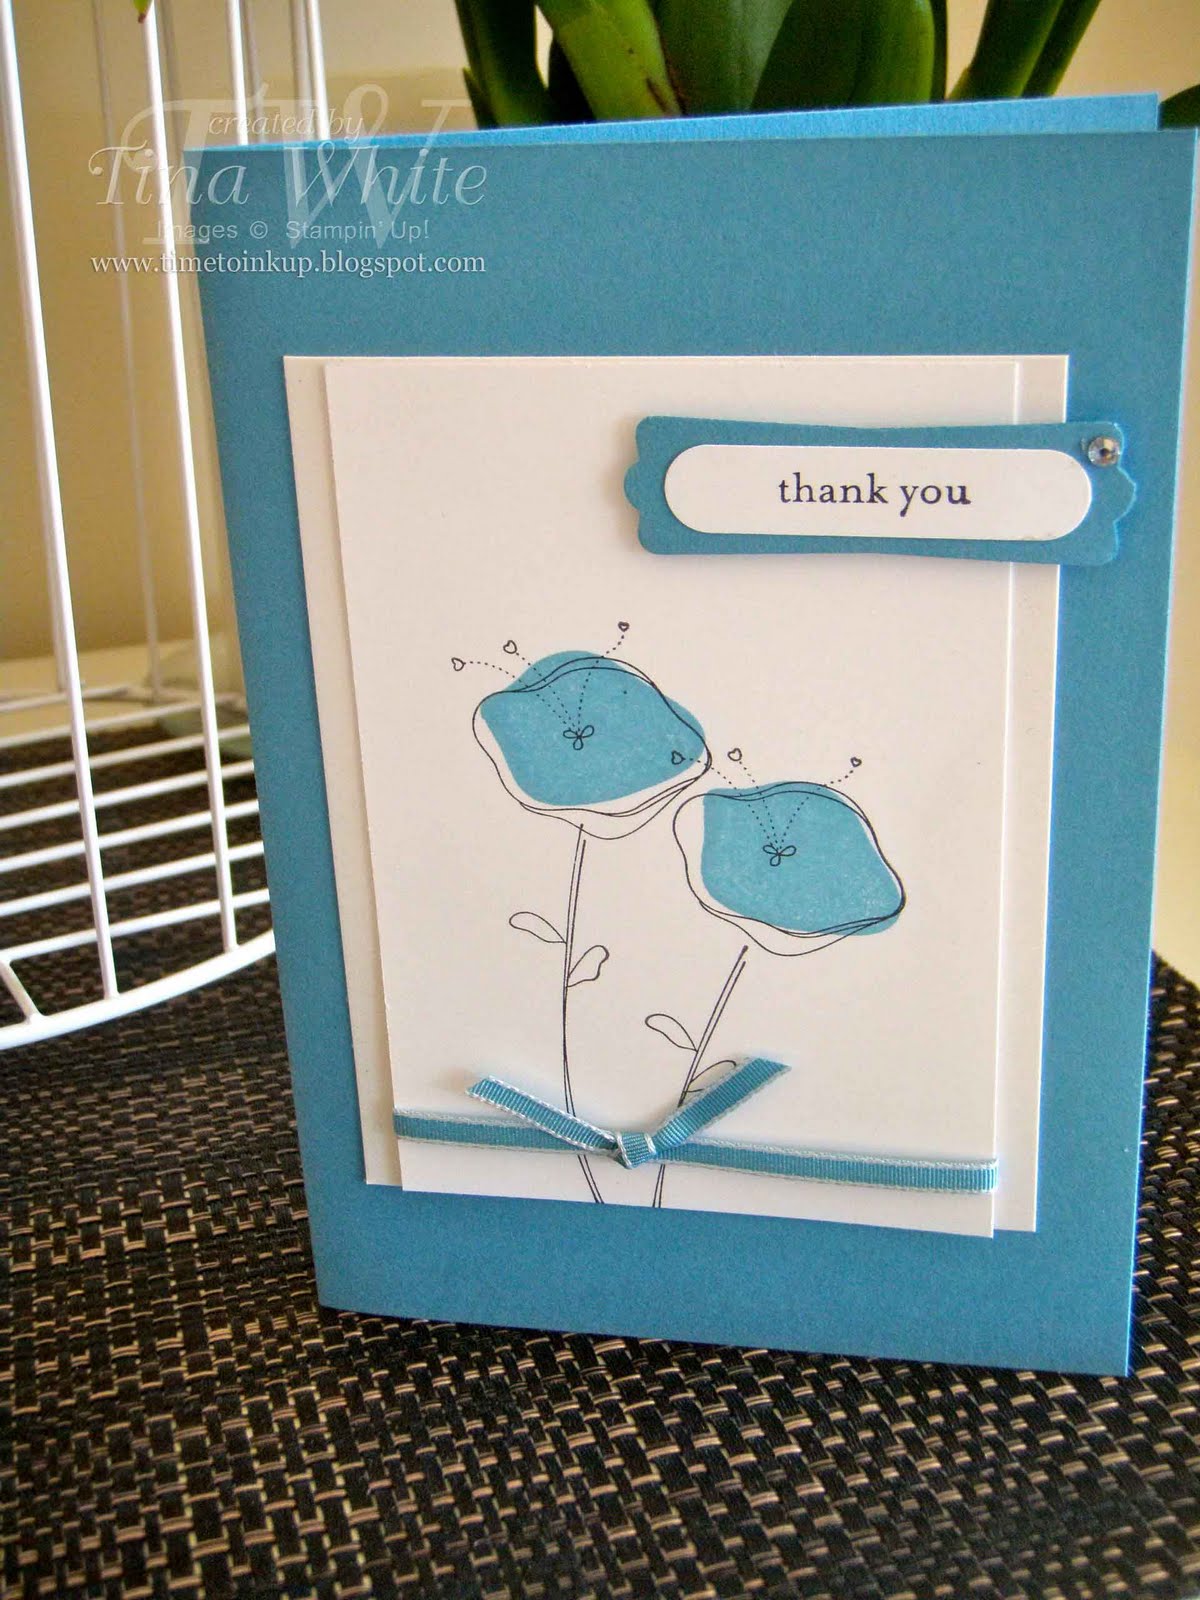
 This was the second card using the Hello Blossom A La Carte Stamp.  I used the lovely new In Colour Pool Party which is becoming my favourite very quickly.  Can you see the new little mini Brads in the centre of the flower as well as the new ruffle ribbon.  Love these too.  This was the simplest of my cards (so I kept getting told LOL).


Then to my tricky card.  I had the ladies using the build a wheel for the background, embossing for the sentiment and the new Pennant Punch and Pennant Parade stamp set for this card.  They loved it but found it a little "challenging".  The colour of the cardstock is Concord Crush, Wisteria Wonder and Perfect Plum.

This was the last item I had them making. It is a Petal Cone gift box used with the Petal Cone die and the Fun Flowers Die.   The Flowers were cut out from the Flirtatious Specialty Paper and slightly scrunched for a different look.  You can't see my box clearly but I embossed that with the Elegant Bouquet embossing folder before putting it together.

There was lots for the ladies to do but the event did go for 9 hours.  We will be doing it again soon.  Had so much fun.  Maybe next time we'll have more time to do our own things.  Nothing like having all that time to ourselves to do craft.

Thanks for dropping by.

Tuesday, September 13, 2011

Awash With Flowers Card Set

 Today I have for you a set of cards we made at my  last class.  It's called Awash with flowers and although it's not a brand new set, I only just bought it a short while ago.  I'm so glad I did because I love it.  It's so easy to use, you don't even have to line up the fill in stamp with the outline as it doesn't fit perfectly inside anyway.   The colours used were Blushing Bride, Marina Mist, Night of Navy and Rich Razzleberry.  All the outlines were stamped using Basic Black.    Each card used a different flower from the set.

 I used the Modern Label and Word Window Punches for the sentiment and added a small stick on Rhinestone for some "BLING".  


You can't see in the picture but behind each piece with the image stamped on there is a piece of Shimmer Paper to add a bit more interest to the card.


Finally I finished it off with some narrow taffeta ribbon with a simple knot tied in it.  Overall a very easy card set to make. 


Friday, September 9, 2011

More Button Buddies

I have another button buddy to share with you today.  Isn't he adorable.  The little snail is so cute.  I chose to use him three times and change the button colour along the way.  I've stuck a small piece of paper into the first and last button holes to create the image of thread.  Linen Thread is used in the middle tied in a little bow to finish it off.  You can also see I've used ink to paper for the background.  This is a very easy card to make and I whipped it up in about 10 minutes (after I chose which colours to use). 

This set certainly makes using up your buttons a breeze.

On a different note, it was my birthday last month and a good friend of mine, Debbie made me a beautiful card using the Aviary set.  I mentioned to her that I hadn't even put ink to my set yet so she made me a card.  I think it's beautiful.  Look at the detail in those little cages which have all been clear embossed and pieces cut out.

 I just love the colours too, Soft Suede and Baja Breeze.  We are so alike with out tastes.

Making more things for my catalogue launch next Saturday.   If there is anyone wishing to come, I'm taking a few more people.  Please let me know ASAP.   I'll be posting my projects and some piccies for those who are unable to attend.  Keep your eyes peeled.

Till next time, happy stamping


You might also like:

Related Posts Plugin for WordPress, Blogger...